
If you want to a fun project, try making your own masquerade mask.
Here’s a short video that takes you through the progression of the Warrior Princess Mask from sculpting, decorating, and photographing to poetry and a painting:
Masks possess an appeal for many people. Perhaps their mysterious nature invites us to hide parts of who we are while we develop talents we want to have.
I became intrigued with masks while I was developing my creativity and decided to make my own masks.
This first lesson will teach you how to make a clay mask that you can display as well as use as a mold for a plaster cloth mask, which is lighter to wear.
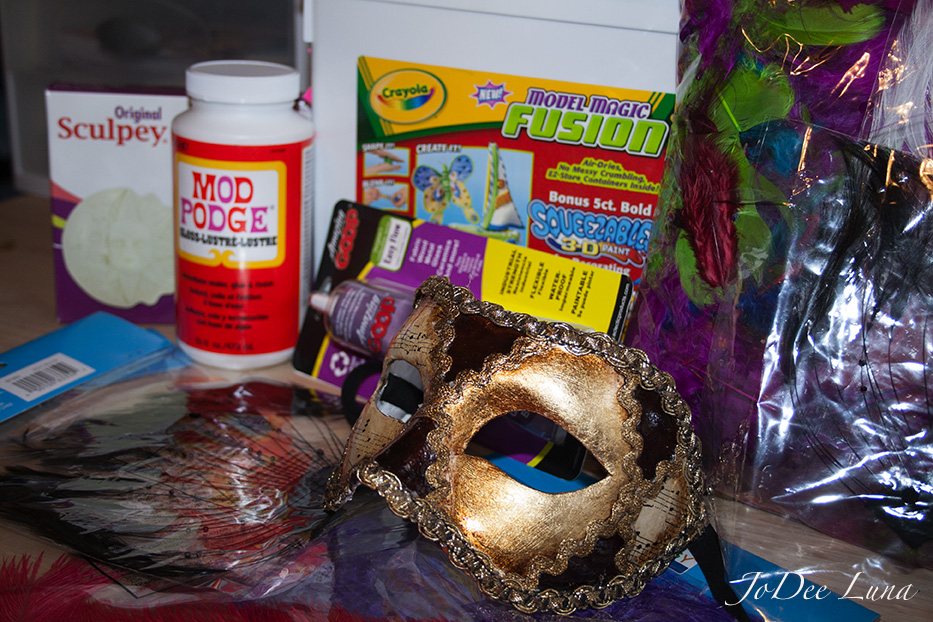
Check out this Mixed Media Mask-Making Essentials list on my Amazon Storefront for products I use. As an Amazon Associate, I earn from qualifying purchases. Here is a suggested supply list:
- A mask
- Sculpey (lightweight clay you form and then bake in the oven)
- Clay sculpting tools for cutting and forming
- A clay pot to place the mask on while baking
- Basic acrylic paints are my daughter’s favorite (try some metallic colors)
- Craft glue
- Scrapbook papers for cutting out shapes and designs
- Braided lace, feathers, and beads for accents
- Wax paper
- Cutting mat
- A mask
- Tin foil
- An instrument for carving
Follow these simple instructions to design a clay mask:
Step 1: Soften a lump of clay the size of a softball by kneading it with your hands. Press the clay onto a flat surface. Use a piece of wax paper to keep the clay from sticking. Then roll the clay flat until it is 1/8 inch thick, using a cylinder-shaped object.

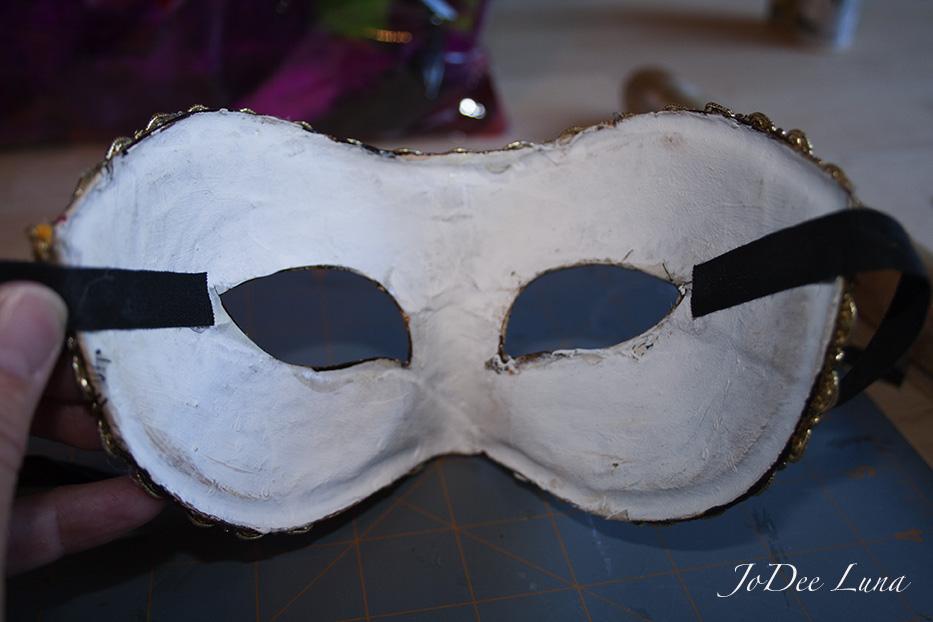
Step 2: Mold the clay onto an existing mask, sculpt the clay on your face, or carve out a design on a flat surface.
If you mold the clay using a mask, trim around the mask.
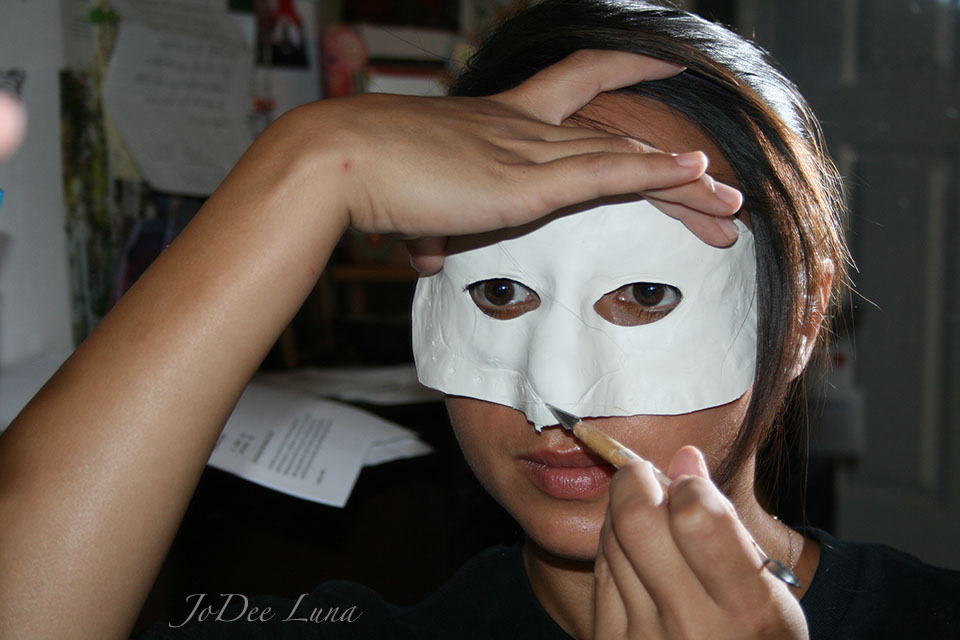

If you use your own face, gently indent the clay in the shape you want. Afterwards, you can cut through the clay on a cutting mat.You can also sculpt the mask on a cutting mat.
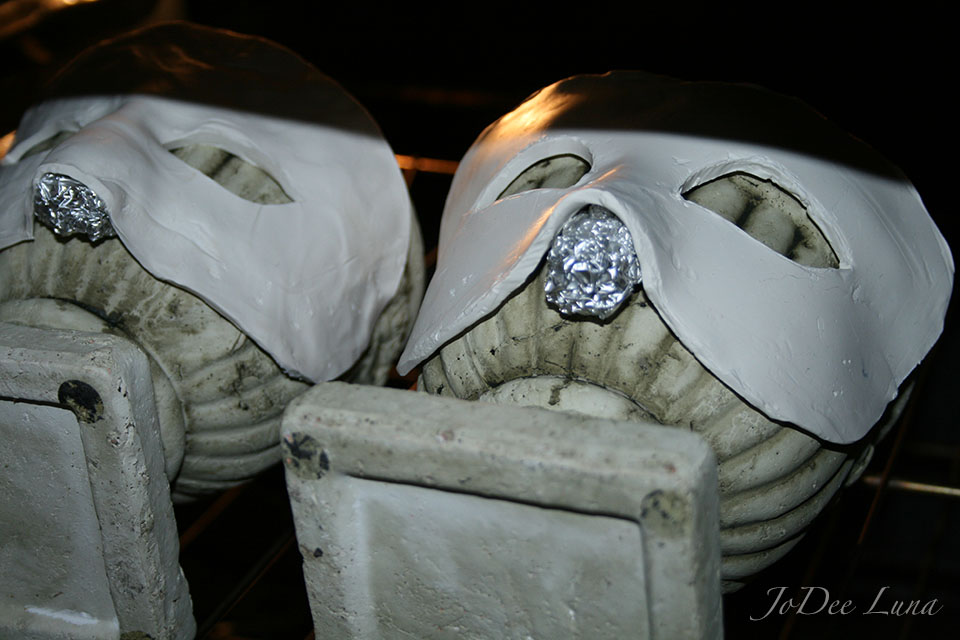
Step 3: Place the mask on a clay pot. Heat the oven to 250 degrees and place the pot with the mask into the oven. Make sure you prop up the nose with a ball of foil.
Step 4: Cook the mask for 15-20 minutes, depending upon how hot your oven gets.
Step 5: Remove the mask and let the mask cool for an hour
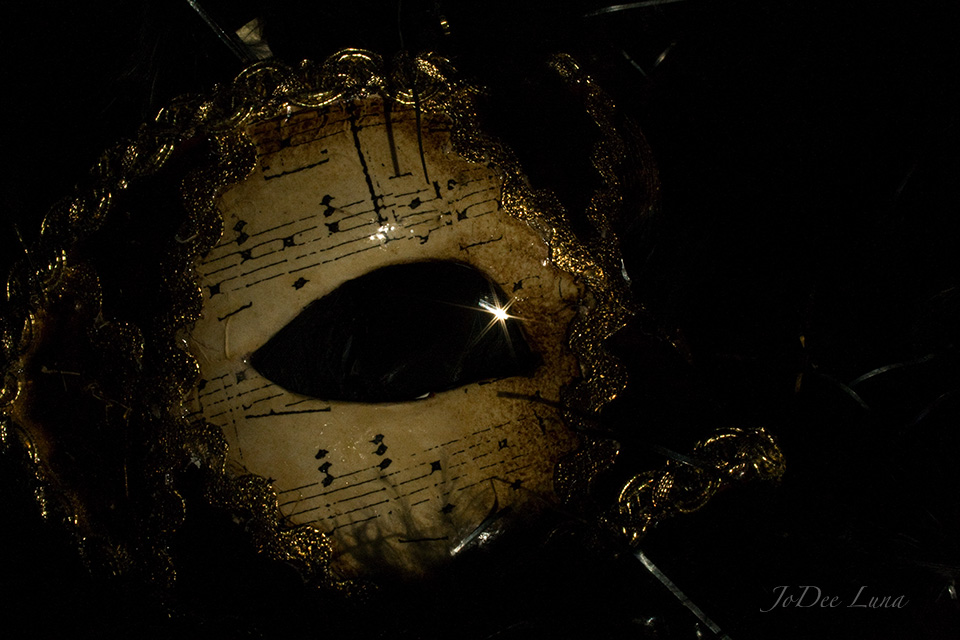
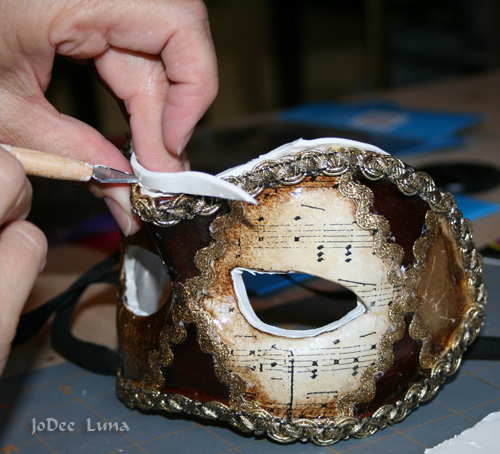
Step 10: Decorate the mask using paint and/or mixed media items.

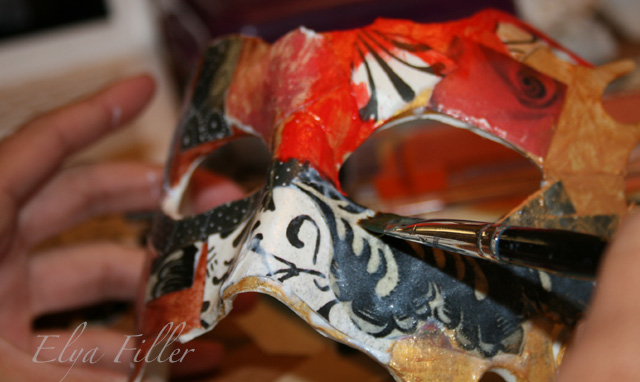
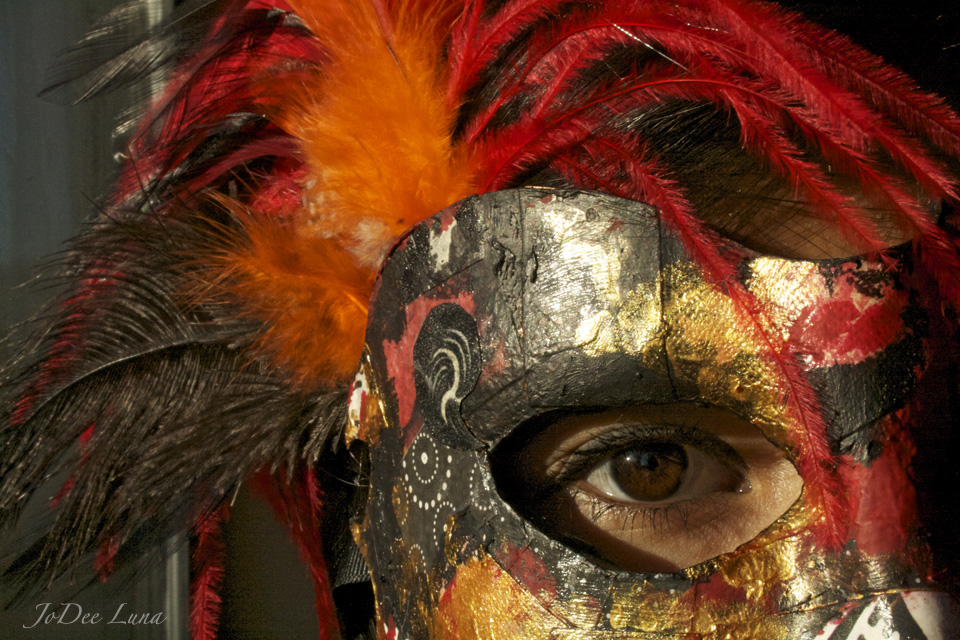
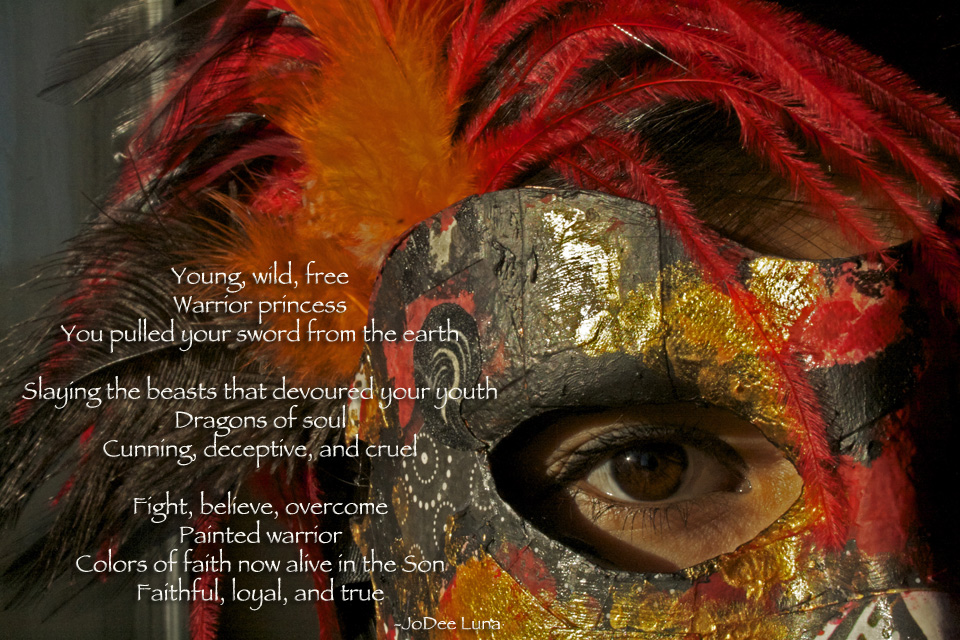
Step 10: Add embellishments. My daughter, Andrea, sculpted this mask, Warrior Princess. Then my other daughter, Elya, created the mixed media artwork. Finally, I added the feathers.

Then this mask inspired a poem…
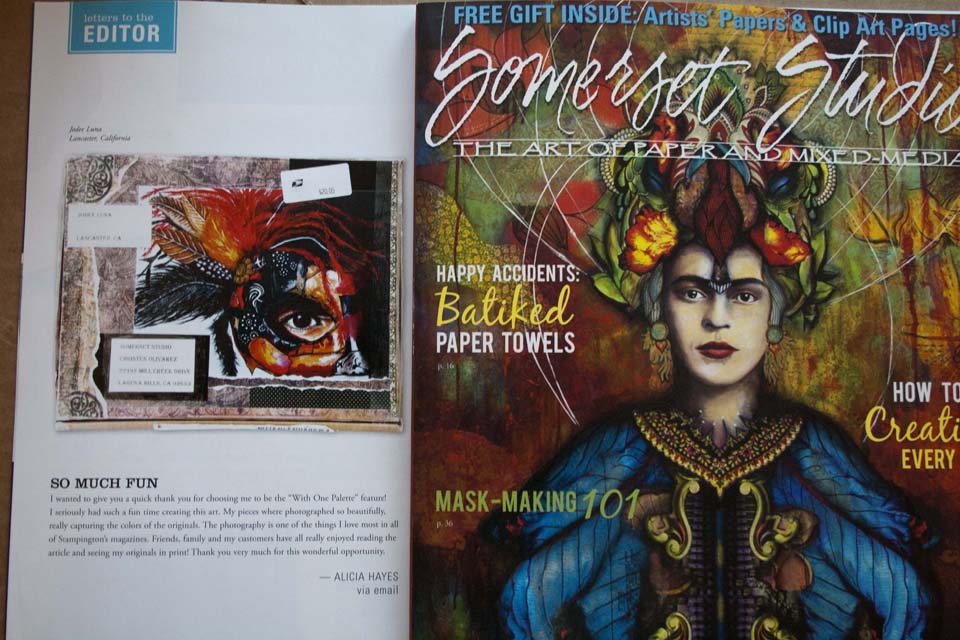
and a painting…

that “Somerset Studio THE ART OF PAPER AND MIXED MEDIA” magazine published on the “Letters to the Editor” page:
You never know where a masquerade mask project will take your creative journey!
- To purchase my original paintings, visit my Etsy Shop.
- To purchase painting reproductions on a variety of products, visit my Fine Art American Shop.
- *For more inspiration visit https://refrainfromtheidentical.com
- If you would like more creative inspiration and tips on how to develop and manage your creative life, check out my book, Refrain from the Identical: Insight and Inspiration for Creative Eclectics.
Connect with me around the web: https://linktr.ee/jodeeluna

Pingback: How to Make a Masquerade Mask Part 1 | JoDee Luna's Blog·
Pingback: How to Make a Plaster Cloth Masquerade Mask | JoDee Luna's Blog·
Pingback: How to Decorate a Masquerade mask with Mixed Media | JoDee Luna's Blog·
Pingback: How to Make a Masquerade Mask Part I | JoDee Luna's Blog·
Pingback: Masquerade Masks: Ideas for Decorating | JoDee Luna's Blog·
Pingback: Why I Create Art | JoDee Luna's Blog·